PCL Series: Visualizing a Simple Cube with PCL in C++
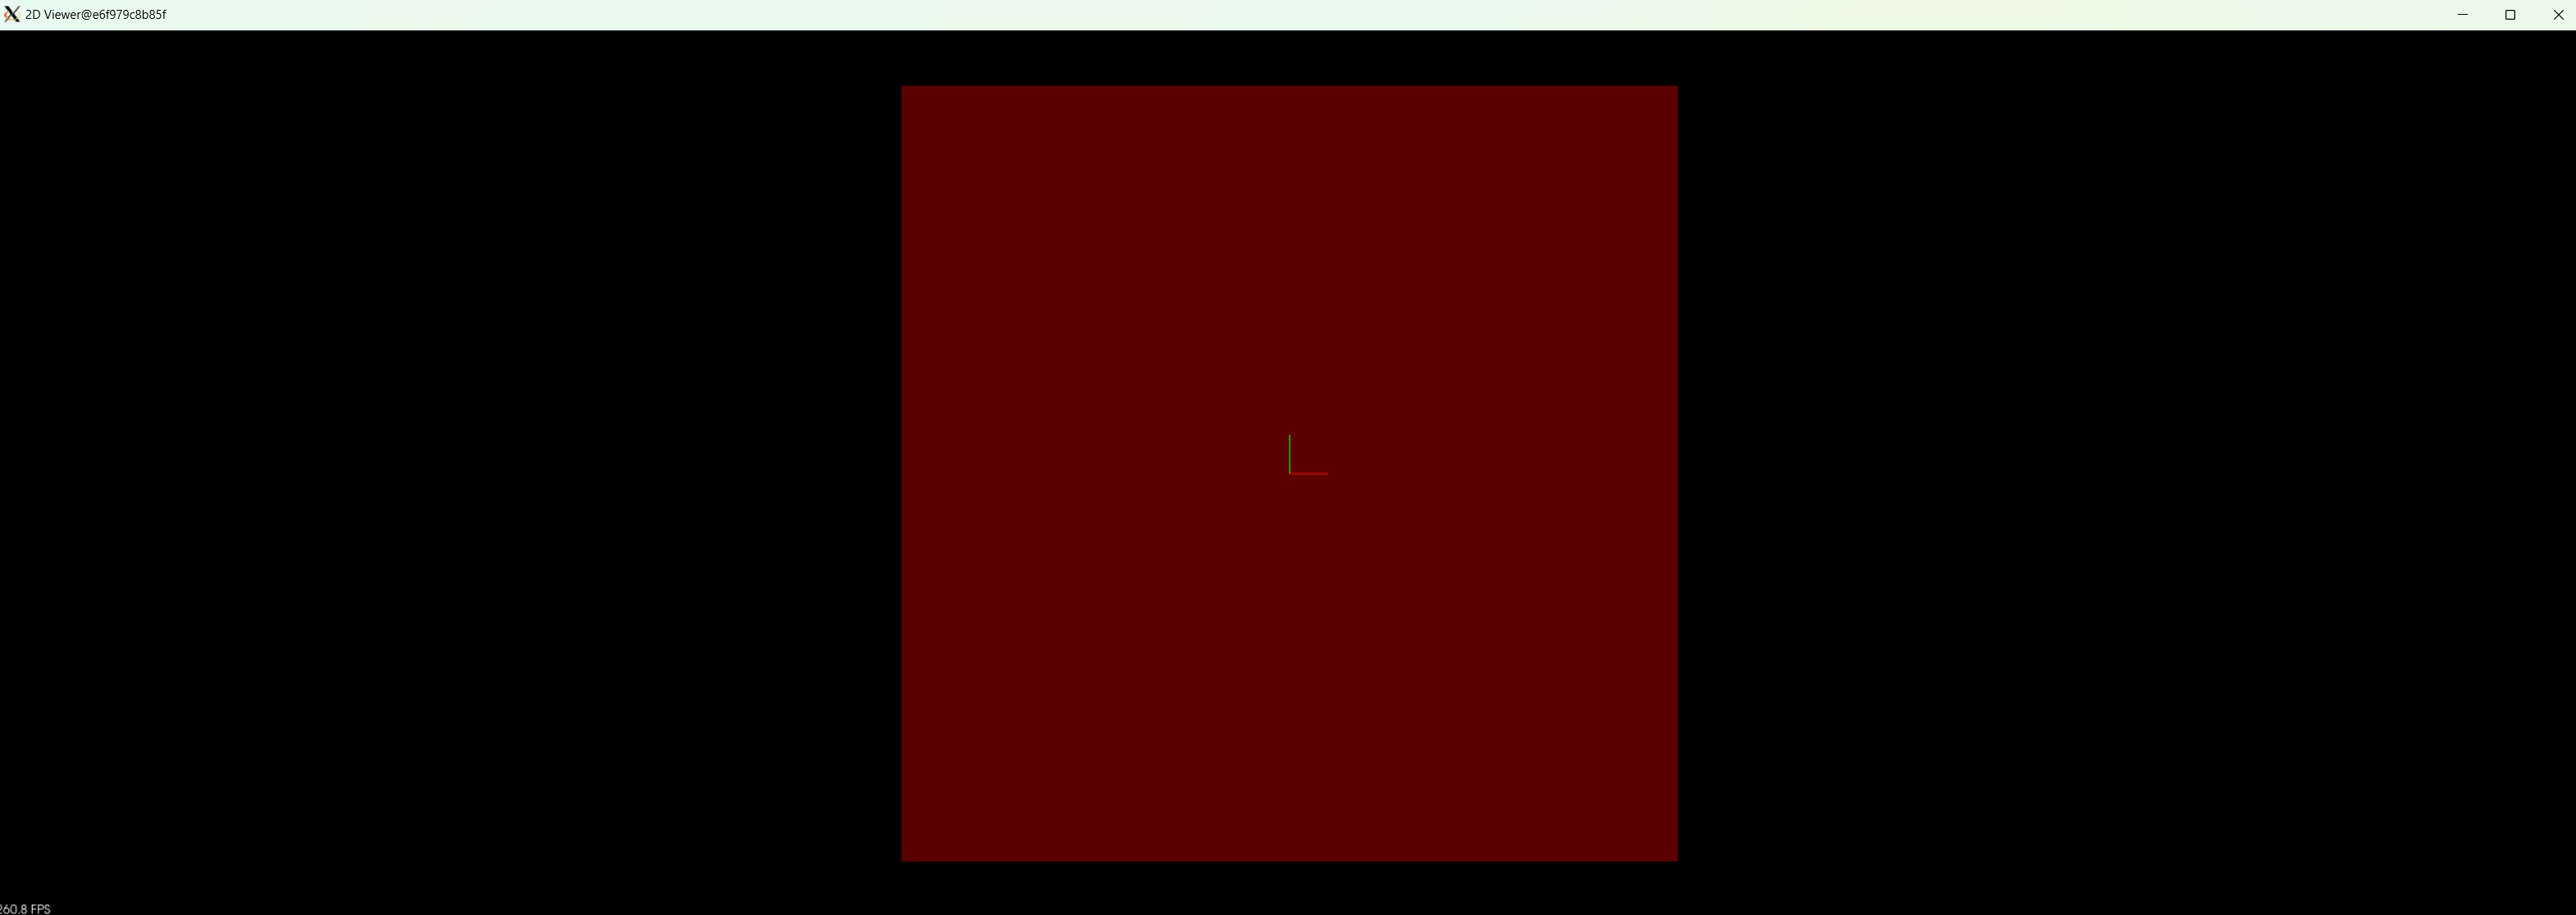
In this post, we’ll walk through a small C++ example using the Point Cloud Library (PCL) to create a basic 3D visualization of a cube. This can be particularly useful for understanding the basics of setting up a simple scene with PCL. We’ll also cover how to configure the development environment with Docker, XServer, and VS Code to easily work with PCL.
Code Explanation
Let’s take a look at the following code:
#include <iostream>
#include <pcl/ModelCoefficients.h>
#include <pcl/point_cloud.h>
#include <pcl/point_types.h>
#include <pcl/visualization/pcl_visualizer.h>
#include <thread>

struct Box
{
    float x_min;
    float y_min;
    float z_min;
    float x_max;
    float y_max;
    float z_max;
};

int main(int argc, char** argv)
{
    /////////////////////////////////////////// CUBE EXAMPLE /////////////////////////////////////////////////
    Box window;
    window.x_min = -10;
    window.x_max = 10;
    window.y_min = -10;
    window.y_max = 10;
    window.z_min = 0;
    window.z_max = 0;
    int zoom = 25;

    pcl::visualization::PCLVisualizer::Ptr viewer(new pcl::visualization::PCLVisualizer("2D Viewer"));
    viewer->setBackgroundColor(0, 0, 0);
    viewer->initCameraParameters();
    viewer->setCameraPosition(0, 0, zoom, 0, 1, 0);
    viewer->addCoordinateSystem(1.0);

    viewer->addCube(window.x_min, window.x_max, window.y_min, window.y_max, 0, 0, 1, 1, 1, "window");

    // Set the color of the cube to red using shape rendering properties (r = 1.0, g = 0.0, b = 0.0)
    viewer->setShapeRenderingProperties(pcl::visualization::PCL_VISUALIZER_COLOR, 1.0, 0.0, 0.0, "window"); // Red cube

    // Set transparency if needed (optional)
    viewer->setShapeRenderingProperties(pcl::visualization::PCL_VISUALIZER_OPACITY, 0.2, "window"); // 20% opaque

    ///////////////////////////////////////////////////////////////////////////////////////////////////////////

    // Main loop to keep the viewer open
    while (!viewer->wasStopped())
    {
        viewer->spinOnce(100);                                       // Update the viewer
        std::this_thread::sleep_for(std::chrono::milliseconds(100)); // Sleep for a bit to reduce CPU usage
    }

    return 0;
}
What’s Happening in the Code?
-
Box Structure: We define a simple
Boxstructure that holds the coordinates of the minimum and maximum values for the cube along the x, y, and z axes. - PCLVisualizer Setup:
- The
PCLVisualizerclass from the PCL library is initialized to create a viewer window. setBackgroundColor(0, 0, 0)sets the background of the viewer to black.initCameraParameters()initializes the camera to enable proper visualization.setCameraPosition(0, 0, zoom, 0, 1, 0)sets the camera position to give a proper 3D view, wherezoomcontrols how far the camera is placed from the cube.- A coordinate system is added to the scene with
addCoordinateSystem(1.0).
- The
- Adding a Cube:
- The cube is created using the bounds from the
Boxstructure. addCube(window.x_min, window.x_max, window.y_min, window.y_max, 0, 0, 1, 1, 1, "window")adds the cube to the viewer with the specified bounds and color (white by default).
- The cube is created using the bounds from the
- Shape Rendering Properties:
- The cube is set to red with the line
setShapeRenderingProperties(pcl::visualization::PCL_VISUALIZER_COLOR, 1.0, 0.0, 0.0, "window"), where(1.0, 0.0, 0.0)is the RGB value for red. - The transparency of the cube is adjusted to 20% with
setShapeRenderingProperties(pcl::visualization::PCL_VISUALIZER_OPACITY, 0.2, "window").
- The cube is set to red with the line
- Main Loop:
- The viewer runs in a loop until the user closes it by calling
wasStopped(). - The
spinOnce()function updates the viewer in each loop iteration. - The thread sleeps for 100 milliseconds to avoid excessive CPU usage.
- The viewer runs in a loop until the user closes it by calling
This simple code demonstrates how to create a 3D scene, set up the camera, and control basic shape properties (like color and transparency) in PCL.

Setting Up the Development Environment
To work with PCL, Docker, XServer, and VS Code DevContainers, you can set up a convenient development environment by following these steps. I’ll be referring to a GitHub repository I created for this purpose:
Repository: PCL Docker Environment with XServer and VS Code DevContainers
Prerequisites
Before setting up the environment, make sure you have:
- Docker: Install from the official Docker site.
- VS Code: Download from here.
- Install the Remote - Containers extension.
- XServer: Required for visualization.
Setup Instructions
-
Clone the Repository: Start by cloning the repository and navigating into the directory:
git clone https://github.com/wambitz/pcl-devcontainer cd pcl-devcontainer -
Build the Docker Image: Build the Docker image using the provided Dockerfile:
docker build -t pcl-dev . -
Run the Docker Container with XServer: To run the Docker container with graphical support for PCL, use the following command:
docker run -it --rm \
    -e DISPLAY=$DISPLAY \
    -v /tmp/.X11-unix:/tmp/.X11-unix \
    pcl-dev
If you’re on Linux, ensure Docker has the necessary permissions by running:
xhost +local:docker -
Develop in VS Code: If you prefer working in VS Code, the repository includes a
devcontainer.jsonfile for a pre-configured development environment.- Open the repository in VS Code.
- Use the
Remote - Containers: Reopen in Containercommand to load the environment within Docker.
-
Build Your Project: Once the container is running, you can build your PCL projects:
cmake -S . -B build
cmake --build build
Known Issues
- VTK Rendering Issues: There are known issues with VTK on newer versions of Ubuntu. To avoid these, the setup builds the PCL from source. You can read more about the issue in this GitHub thread.
For more details on running GUI applications with Docker and XServer, check out this blog post.